Lint buildup is quietly one of the most overlooked fire hazards in Canadian homes. Most people clean the lint trap before or after each load, but that small screen only catches a fraction of what escapes into your dryer’s exhaust system. Lint causes 92% of dryer fire ignitions, and the buildup responsible for those fires is often deep inside the vent duct, well out of sight. Beyond the fire risk, clogged vents force your dryer to work harder, pushing energy bills up and shortening the appliance’s lifespan. This guide walks you through the full process of removing lint safely and effectively, so your dryer runs better and your home stays protected.
Table of Contents
- Understanding dryer lint buildup and why it matters
- Essential tools and safety guidelines for lint removal
- Step-by-step guide: Removing lint buildup from your dryer system
- How often to clean and when to call a professional
- Why a pro’s touch makes all the difference
- Protect your home with expert dryer vent care
- Frequently asked questions
Key Takeaways
| Point | Details |
|---|---|
| Lint is a fire hazard | Lint buildup is the leading cause of dryer fires and should not be ignored. |
| Proper tools matter | Using the right equipment and methods makes lint removal safer and more effective. |
| DIY can’t reach everything | Professional cleaning may be needed for complex or long vent systems to fully remove lint. |
| Clean at least annually | Clean your dryer vent at least once a year, or more often for heavy laundry use. |
| Watch for warning signs | Longer drying times or hot laundry could mean it’s time for a deeper clean. |
Understanding dryer lint buildup and why it matters
Lint is made up of tiny fibres shed from your clothing and bedding during every drying cycle. Your lint trap catches a portion of these fibres, but a significant amount bypasses the trap and travels into the exhaust duct, clings to duct walls, and eventually collects at bends, joints, and the exterior vent cap. Over time, this accumulation restricts airflow, and that is where the real danger begins.
The four main areas where lint collects are the lint trap housing, the flexible duct connecting your dryer to the wall, the rigid exhaust duct running through your wall or ceiling, and the exterior vent flap. Many homeowners focus entirely on the trap and never think about the duct beyond it. That duct, especially if it runs a long distance or has multiple bends, can hold a surprising amount of compacted lint that no standard cleaning routine will touch.
“Lint causes 92% of dryer fire ignitions, and 80% of these fires start in the lint trap or exhaust duct.”
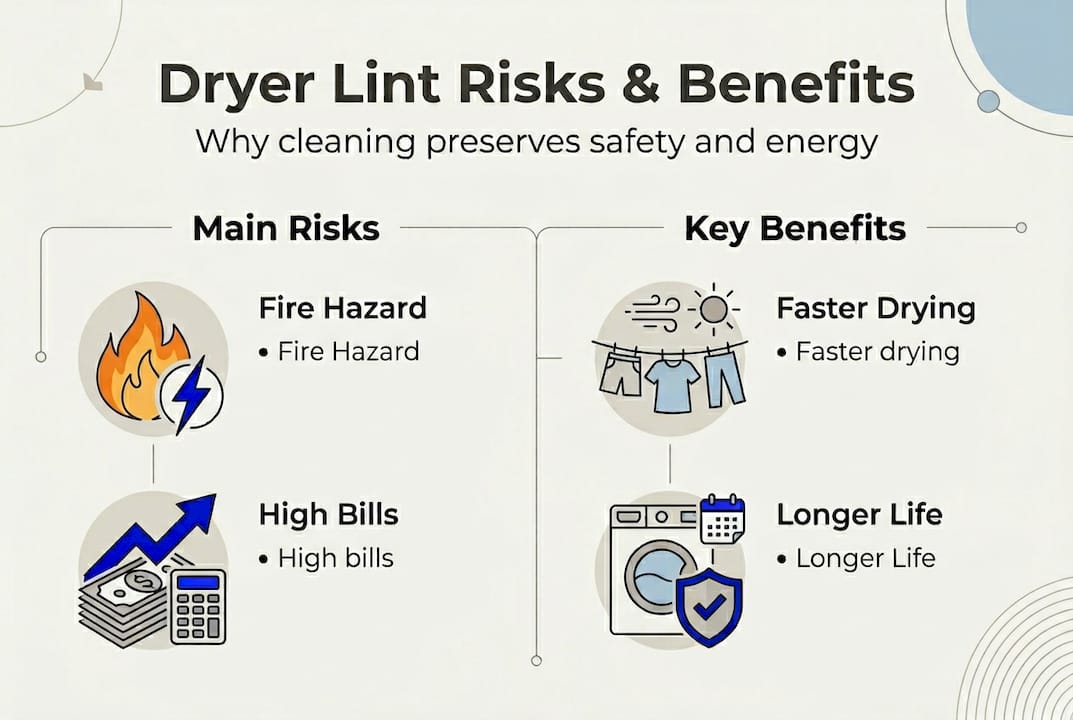
The fire risk is real and statistically significant. Lint is highly flammable. When airflow is restricted, heat builds up inside the dryer and duct. That combination of heat and accumulated lint is all it takes for a fire to start. Understanding the importance of professional dryer vent cleaning becomes clear when you consider that most fire-causing blockages sit in areas that a basic cleaning routine simply cannot reach.
Beyond fire, restricted airflow has measurable effects on your energy consumption and appliance health. When your dryer cannot exhaust properly, it runs longer to dry the same load, consuming more electricity or gas. Lint buildup can reduce dryer efficiency by up to 30%, meaning you pay significantly more each month for the same results. Repeated overheating also stresses the heating element, drum bearings, and motor, leading to costly repairs or early replacement.
| Risk factor | Impact |
|---|---|
| Lint as ignition source | 92% of dryer fire ignitions |
| Fire origin location | 80% start in trap or exhaust duct |
| Efficiency reduction | Up to 30% more energy consumed |
| Appliance wear | Premature failure of heating elements and motor |
Understanding these risks is the first step. The next is knowing how to address them with the right tools and approach.
Essential tools and safety guidelines for lint removal
Now that you know what makes lint so hazardous, let’s look at the gear and safety steps that make removal effective and safe. Having the right equipment before you start is not optional. Using the wrong tools can damage your ductwork, push lint deeper into the system, or create new hazards.
Here is what you need:
| Tool | Purpose | Consideration |
|---|---|---|
| Vacuum with hose attachment | Remove loose lint from trap and duct opening | Most effective for accessible areas |
| Dryer vent brush kit | Scrub duct walls through the vent | Choose flexible rods for long or bent ducts |
| Flathead and Phillips screwdrivers | Remove vent covers and access panels | Keep both sizes handy |
| Protective gloves | Protect hands from sharp duct edges | Essential for metal ductwork |
| Dust mask or respirator | Prevent inhaling fine lint particles | Important in enclosed laundry rooms |
| Flashlight or headlamp | Illuminate the duct interior | Helps spot blockages and damage |
Before you touch anything, safety comes first. Unplug your electric dryer from the wall outlet completely. If you have a gas dryer, turn off the gas supply valve behind the unit before moving it. Never assume the dryer is safe simply because it is switched off at the controls. Wear your gloves and dust mask throughout the process, especially when pulling the dryer away from the wall, as disturbed lint can become airborne quickly.
What not to use is just as important as what you should use. DIY lint removal can miss deep lint in complex systems, and using the wrong tools makes this worse. Avoid leaf blowers, which force lint further into the duct rather than removing it. Wire brushes can scratch and puncture flexible aluminium ducting, creating gaps where lint collects even faster. Never use water to flush a duct, as moisture encourages mould growth inside the vent system.
Pro Tip: Use a vacuum with a long, flexible hose attachment to reach the first 60 to 90 centimetres inside the duct opening. This alone removes a large portion of accessible lint before you introduce any brushes.
One important reality check: recommended professional techniques involve high-powered rotary brush systems and industrial vacuums that generate far more suction than any consumer tool. If your duct is long, has multiple 90-degree bends, or runs through the ceiling, dryer vent cleaning services will reach areas that standard DIY equipment simply cannot access safely.
Step-by-step guide: Removing lint buildup from your dryer system
With your tools and safety gear ready, it’s time to tackle lint removal. Here is a complete walkthrough for a thorough clean of every lint-prone area in your dryer system.
-
Unplug the dryer and shut off gas if applicable. Pull the dryer away from the wall carefully. Have someone help if the unit is heavy. Give yourself enough room to work behind the machine comfortably.
-
Remove and clean the lint trap. Pull the lint trap out and peel off the visible lint sheet by hand. Then use your vacuum’s crevice tool to clean inside the lint trap housing. Lint builds up in the slot itself, not just on the screen. Run the vacuum down into the housing for at least 15 to 20 seconds.
-
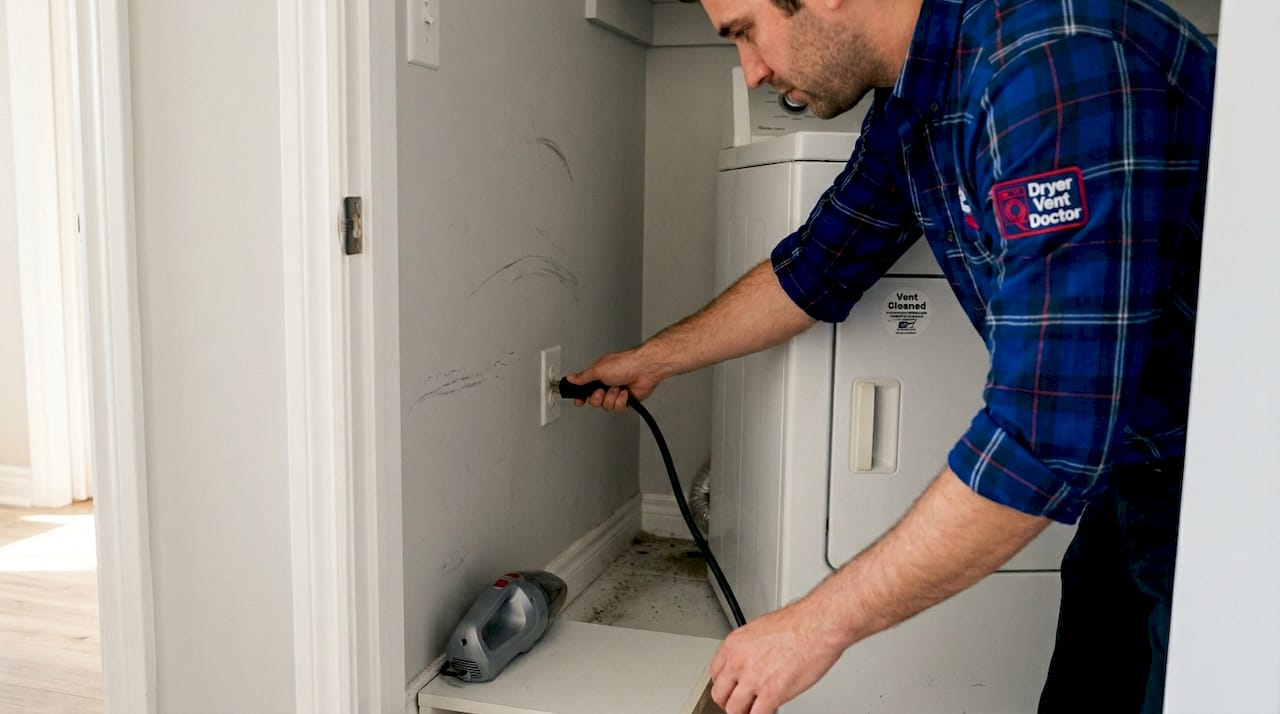
Disconnect the exhaust duct from the dryer. Loosen the clamp or unscrew the connection where the flexible duct meets the dryer’s exhaust port. Set the duct aside. Vacuum directly into the dryer’s exhaust port opening. This area collects compacted lint that the trap misses entirely.
-
Clean the flexible duct. Lay the flexible duct on the floor and run your vent brush kit through it from both ends. Follow up with the vacuum hose to pull out loosened lint. Inspect the duct for any tears, kinks, or crushed sections. A damaged flexible duct should be replaced, not repaired with tape.
-
Clean the rigid exhaust duct inside the wall. Insert your flexible brush rods into the wall duct opening and work them through in sections, adding rod extensions as needed. Vacuum from the same end to capture dislodged lint. If the duct runs a long distance or has bends, you may only reach a portion of it.
-
Clear the exterior vent cap. Go outside and locate the vent exit on your home’s exterior wall or roof. Remove the vent cap if it detaches, and clear any lint, debris, or bird nesting material from the flap and opening. A blocked exterior cap is a common cause of poor airflow that homeowners overlook entirely.
-
Reassemble and test. Reconnect the flexible duct to the dryer and secure the clamp. Push the dryer back into position without crimping the duct. Plug in the dryer, restore gas if applicable, and run a short air-only cycle. Stand outside and confirm that you can feel warm air flowing from the exterior vent. No airflow or weak airflow means a blockage remains.
Pro Tip: Clean the lint trap after every single load. This one habit dramatically reduces how much lint enters the duct system between deep cleans, keeping your dryer running efficiently and reducing fire risk every day.
DIY cleaning may not reach deep lint in complex or long vent systems, which can present ongoing risks even after a thorough home cleaning effort. If your test run shows weak airflow, contact a professional who uses the professional vent cleaning process with rotary equipment designed for complete duct clearing.
How often to clean and when to call a professional
Even the most diligent homeowners wonder how often to repeat the process or whether they should seek help. The answer depends on your household’s laundry habits, your duct configuration, and what warning signs your dryer is showing.
Recommended cleaning frequency:
- Once a year: Minimum for average households with standard duct lengths
- Every 6 months: Recommended for large families doing five or more loads per week
- Every 3 to 6 months: Essential for households with pets, as pet hair accelerates lint accumulation significantly
- After any renovation: Construction dust and debris can enter and block vent systems quickly
Some sources recommend annual cleaning, others every 6 to 12 months for high-risk households. For property managers overseeing multi-unit buildings, quarterly inspections are a reasonable standard given the volume of laundry across multiple tenants.
Warning signs that your vent needs immediate attention:
- Clothes take two or more cycles to dry fully
- The dryer exterior or your laundry room feels unusually hot during operation
- A burning or musty odour comes from the dryer or vent area
- Lint is visible around the exterior vent opening or on clothing after drying
- The dryer shuts off mid-cycle due to overheating
When any of these signs appear, do not delay. These are not minor inconveniences. They are indicators that your system is already compromised and that fire risk has increased. Check recommended cleaning intervals for your region and usage level to stay ahead of buildup.
| Factor | DIY cleaning | Professional cleaning |
|---|---|---|
| Time required | 1 to 2 hours | 45 to 90 minutes |
| Duct reach | Limited to accessible sections | Full duct length, including bends |
| Equipment | Consumer vacuum and brush kit | Industrial vacuum and rotary brush system |
| Safety assurance | Partial, depends on duct complexity | Complete inspection and clearance |
| Cost | Low upfront, tool purchase required | Moderate, one-time service fee |
| Recommended for | Short, straight ducts | Long, complex, or multi-bend systems |
When your duct system is complex, runs through multiple floors, or shows persistent buildup despite regular DIY cleaning, a professional service is not a luxury. It is the only way to ensure the vent is genuinely clear from dryer to exterior exit.
Why a pro’s touch makes all the difference
Here is a perspective that does not get said enough: most homeowners who clean their dryer vents regularly still have a partially blocked system. That is not a criticism. It is simply the reality of what consumer tools can accomplish versus what professional equipment achieves.
The sections of ductwork that DIY brushes and vacuums cannot reach are precisely where the most dangerous lint accumulations form. Bends, long horizontal runs, and connections inside wall cavities trap compacted lint that has been building for years. Standard flexible brush kits lose their effectiveness beyond a metre or two, especially around corners.
Professionals use high-powered vacuums and rotary brush systems that generate enough force to dislodge and extract lint from the full length of even the most complex duct configurations. The popular belief that a thorough annual DIY clean is “good enough” is worth challenging directly. For simple, short ducts, it may be. For anything more complex, it is not. The fire statistics back this up. Understanding why professional vent services matter is not about selling a service. It is about being honest that the tools available to homeowners have real limits, and those limits have real consequences.
Protect your home with expert dryer vent care
You have now seen exactly how lint accumulates, why it is dangerous, and what it takes to remove it properly. Knowing the steps is valuable, but having a professional handle the full system gives you something no DIY session can: complete confidence that every centimetre of your vent is clear.
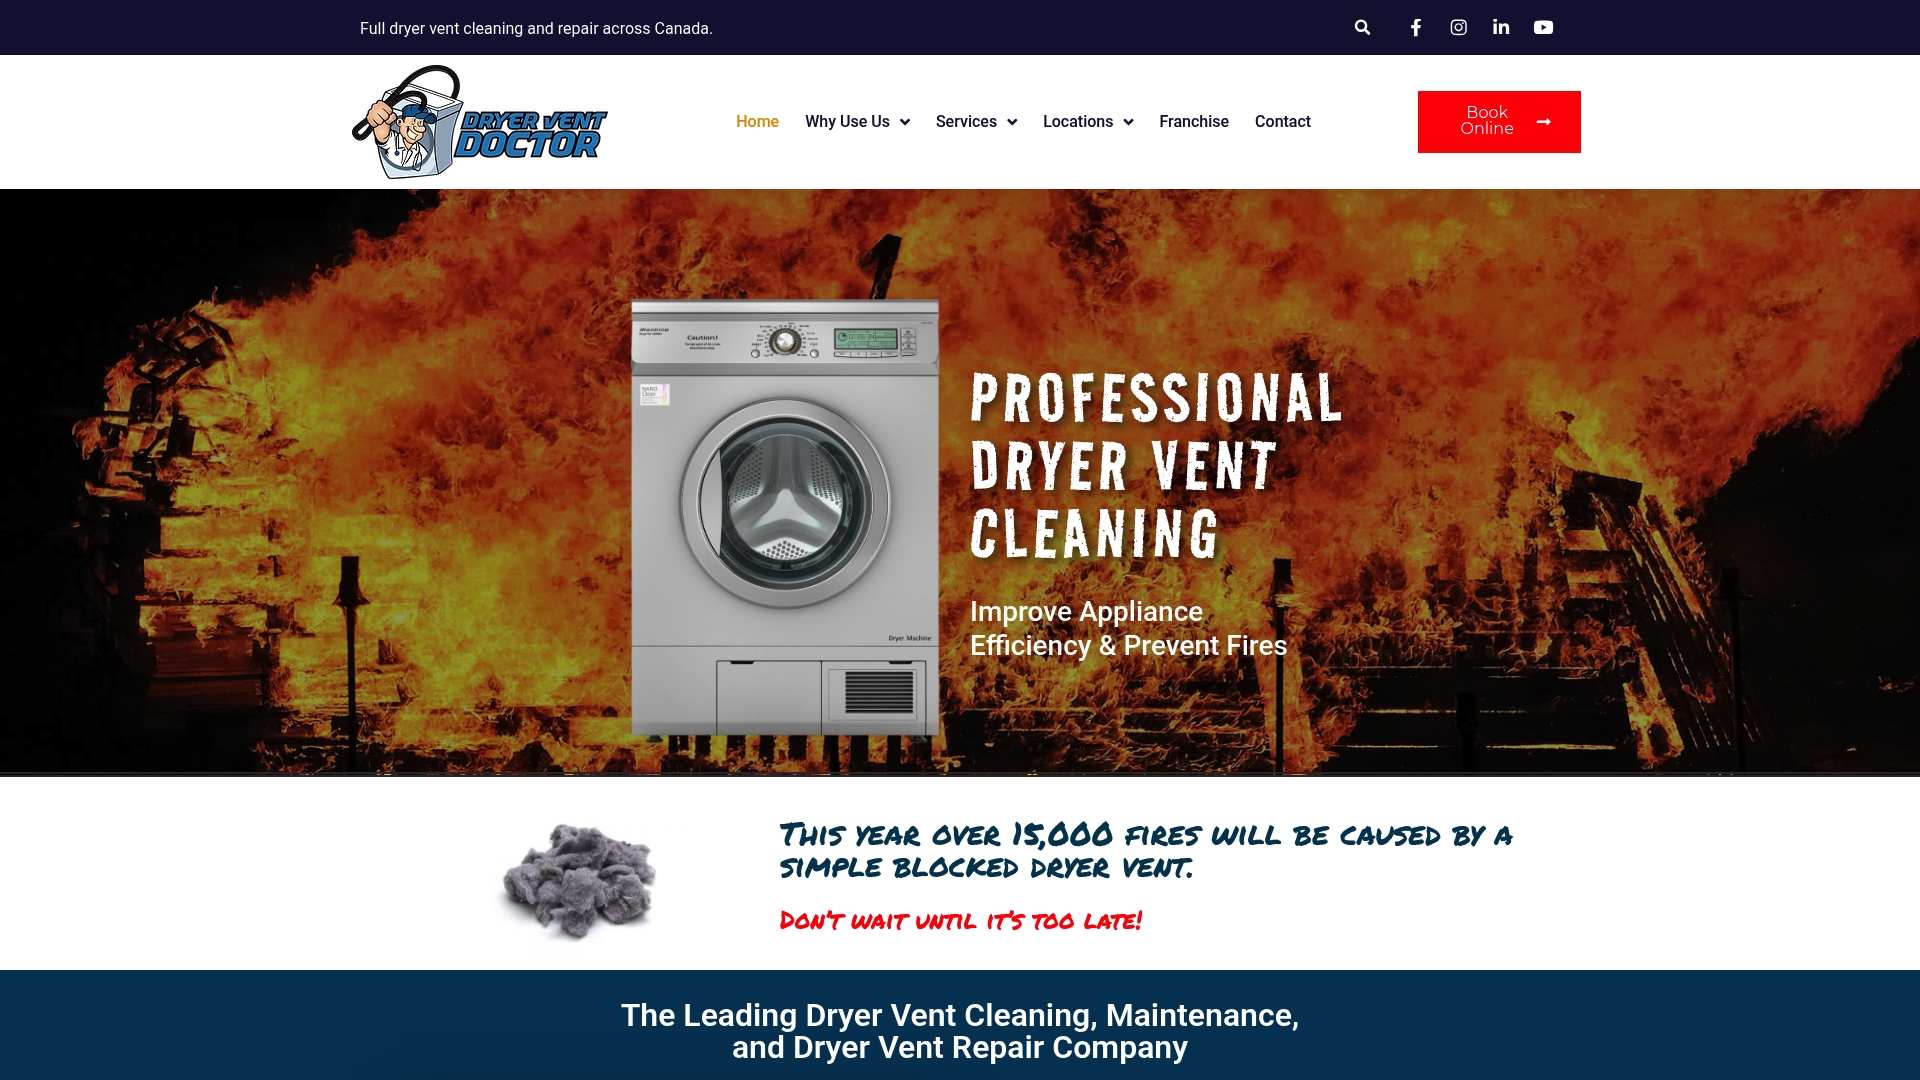
Dryer Vent Doctor specialises in thorough dryer vent cleaning services for homeowners and property managers across Canada. Using industrial-grade equipment and proven methods, the team clears lint from the full duct length, inspects for damage, and ensures your system meets fire safety standards. If you want to understand exactly how the cleaning process works before booking, the details are all there. Free estimates and easy online booking make it simple to take the next step toward a safer, more efficient home.
Frequently asked questions
How often should I clean my dryer vent to prevent lint buildup?
Clean your dryer vent at least once a year, or every 6 to 12 months for large households or high-volume laundry use. Pet owners and families with heavy laundry loads should lean toward the shorter interval.
What are the signs that my dryer vent has too much lint buildup?
Key signs include clothes taking more than one cycle to dry, the dryer or laundry room running unusually hot, musty or burning odours during operation, and lint appearing around the exterior vent opening.
Can I remove all the lint by myself, or do I need a professional?
DIY cleaning works well for short, straight ducts, but deep lint in complex systems requires professional rotary equipment to fully clear. If your duct has multiple bends or runs a long distance, a professional service is the safer choice.
Is it necessary to unplug my dryer before cleaning lint and vents?
Yes, always unplug your electric dryer and shut off the gas supply on gas models before cleaning. This prevents accidental electrical shock or gas exposure while you work behind or inside the unit.
Why are dryer fires often linked to lint buildup?
Lint is extremely flammable and restricts airflow, causing heat to build up inside the dryer and duct. Lint causes 92% of dryer fire ignitions, making regular vent cleaning one of the most effective fire prevention measures a homeowner can take.
